This page contains support material for Think Python, second edition.
For beginners I recommend starting out with these steps:
- Use an online “Python in a browser” service like PythonAnywhere to run Python code in interactive mode, which means you can type and execute one line of code at a time.
- Still running Python in a browser, start putting Python code in a file, called a script, and run the whole script.
- Install Python on your own computer.
- Consider using IPython/Jupyter, an interactive development environment for Python (and other languages).
I provide detailed instructions for these steps on this web page (rather than in the book) because it is easier to maintain as things change.
If you are comfortable installing things on your computer, feel free to skip directly to Step 3.
Step 1: Python in a browser, interactive mode
There are several sites that allow you to run Python in a browser. You can use any one you like, but I’ll provide detailed instructions for PythonAnywhere.
1) Go to pythonanywhere.com and click on “Pricing & Sign up” in the upper right. A free beginner account is enough to get started.
After you create an account, you should see a page like this:
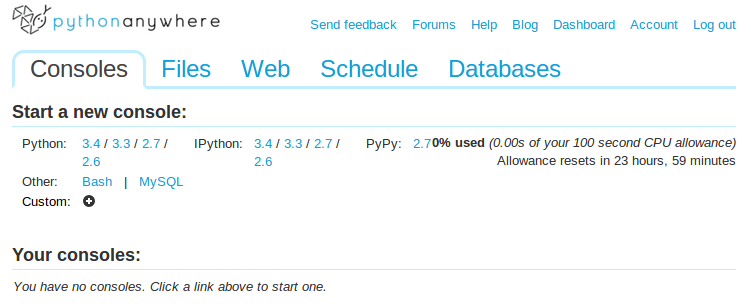
A Python “console” is a window where you can execute Python commands. The other consoles allow you to execute other kinds of commands.
2) Under “Start a new Console”, select “Python: 3.4” which will create a new console running a current version of Python 3. The result should look like this:
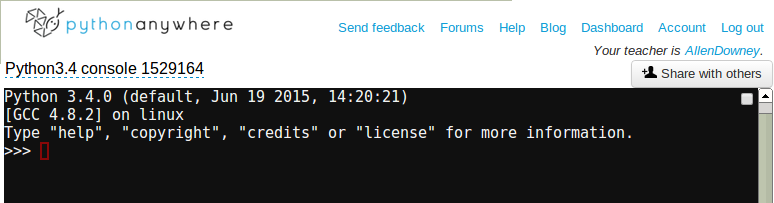
In the black window, the first three lines contain information about the Python interpreter and the operating system it’s running on. The next line contains a “prompt” that indicates that the interpreter is ready for you to type Python code. You can type any of the examples from the book here, and the interpreter will execute them and display the results.
3) Now if you click on “Dashboard” in the upper right, you’ll see the new console under “Your consoles”:
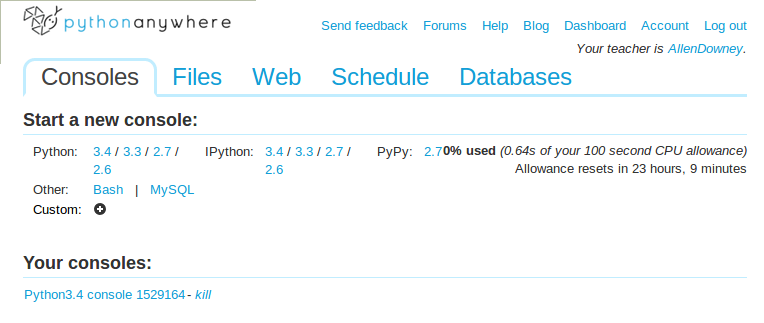
To get back to your console, click on its name, in this example “Python 3.4 console 1529164”. You can keep your consoles around as long as you like, but if you want to delete one, press “kill”.
4) Optional: If you like, you can nominate me as your “teacher” on PythonAnywhere. If you have questions, I might be able to help, depending on my availability. If you nominate me, I will have access to the consoles and files you create on PythonAnywhere, but I will not have any access to your computer. If that sounds ok, click on the “Account” link in the upper right and then on the “Teacher” tab. It should look like this:
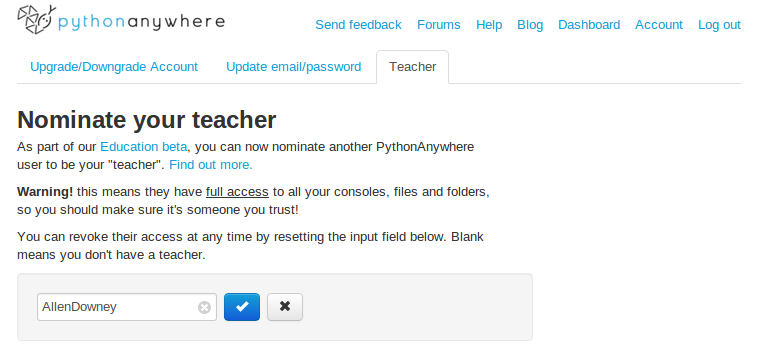
Type my user name, “AllenDowney”, in the text box, then press the check button. I’ll get an email letting me know that you’ve signed up.
5) Finally, click on “Dashboard”, select an open console or create a new one, and get back to trying out the examples and exercises in the book.
Step 2: Python in a browser, script mode
Running Python code in interactive mode is a good way to get started, but if you are working with more than a few lines of code, it can be clumsy.
The alternative is to save code in a file called a script and use the interpreter to execute the contents of the script. Here’s how to do that on PythonAnywhere.
1) Click on “Dashboard” in the upper right and then select the “Files” tab. It should look like this:
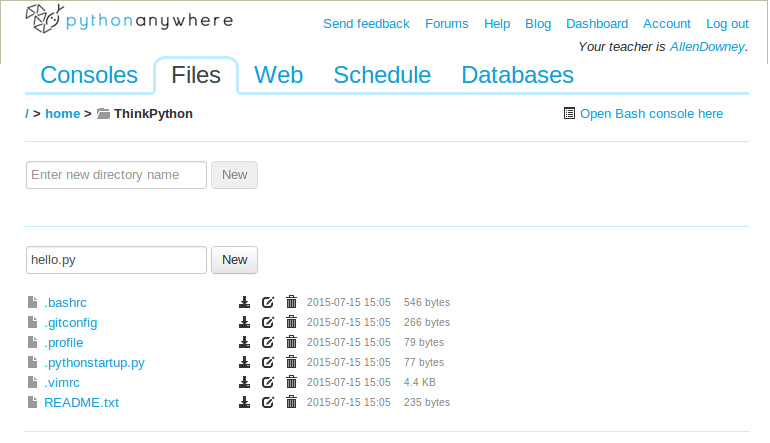
You’ll see a list of files that were created automatically.
2) In the text box that says “Enter new file name”, type a file name like hello.py. By convention, filenames for Python scripts end in .py. Press “New”. The result should look like this:

The main window is an editor where you can type Python code like the example above. When you are ready to run, press the black button with the three angle brackets (>>>). The first time you do this, your browser might ask whether to allow popups for this site. Say yes.
A new window should appear that shows the result of your program. Now you can edit and run the program as many times as you like.
3) When you are done, close the output window and go back to the “Files” tab. You should see the file you created on the list. Click on the icons to download, edit, or delete the file.
If you go back to the “Consoles” tab, you might see a console for the file you edited. When you are done working with the file, you can kill this console (but your file will still be there).
Step 3: Installing Python on your computer
For Linux, Windows, and Mac, I highly recommend installing Anaconda, which is a Python distribution that includes the modules you are most likely to use. It is easy to install, and because it usually installs in your home directory, you don’t need admin privileges. It is also free.
1) Start a browser and go to the Anaconda downloads page.
2) In the upper right, click “I want Python 3.4”.
3) Select the installer that’s appropriate for your system, probably the 64-bit version unless you are running old hardware.
4) When the download completes, open it (unless it opens automatically).
5) The Setup Wizard will prompt you for some configuration information. You can probably accept the default values. I recommend that you allow the installer to set your search path and register the Anaconda version of Python, especially if you have an older version of Python already installed.
6) From the Start menu, search for “idle” which is the name of a simple Python programming environment that is included in most Python distributions. When you launch IDLE, you should see a command window or “shell” running a Python interpreter. You can type and run Python statements in this window.
7) To write a script, select New from the File menu. Type some Python code and then select Save from the File menu. Choose a file name and save it in a location in your home folder (the default location might be in Anaconda’s script folder).
8) To run the script, select Run Module from the Run menu, or press F5. The results should appear in the command window.
Troubleshooting
1) If you already have Python on your system, you might run into some problems if you accidentally run the previously-installed version instead of the new version you just installed. To check, launch Python or IDLE and check the version information that’s displayed when they start. You should see some version of Python 3 (when I wrote this the current version was Python 3.4.3), and some version of Anaconda (like 2.3.0). If not, you are not running the Python you just installed. In that case you might be able to find and launch the right version, or you might be able to change your search path, or you could just run the installer again and let it change the search path for you.
Step 4: Running Jupyter
If you installed Anaconda in the previous step, you already have Jupyter, which is an interactive development environment for Python (and other languages). Until recently, Jupyter was called IPython, so you might also see that name.
From the Start menu, search for Jupyter. You might see several options:
- Jupyter itself launches a Python interpreter with some additional features.
- Jupyter QTConsole launches a Python interpreter in a graphical environment.
- Jupyter Notebook launches Python running in a browser.
I recommend Jupyter Notebook. From the command line, you can launch Jupyter by typing
$ jupyter notebook
You can read more about Jupyter here.